Danielle Blasse 7010 - Cloe Pace-Soler 7352 - Rebecca Holloway 7279 - Natasha Welch 7399
Townley Grammar School - 14109

Friday, 20 December 2013

Green Screen Editing

1) First of all, I had to choose which clips to use in the scene. I decided first of all to use a clip of the protagonist pacing with the antagonist standing in the background. I thought this would portray the stress on her mind, and also indicate that the antagonist, being her imaginary friend is the cause of it.

2) I used the Keyer tool on the protagonist clip, and then dragged on the image of the antagonist in the background. This made sure that the image of the protagonist was in front of the other clip, to avoid it looking unrealistic. I then had to export this clip before I could put a background image on.


3) I chose the background of the shot as a picture of a padded cell, as I thought this would look effective against her pacing as it would show her to be in a room which makes it look more 3D and effective than against a flat 2D background.

4) I put the 'Keyer' effect on the green screen image, which enables me to change the background.
5) I used the 'crop' tool on the padded cell image, to remove the black borders around it as this made it look unprofessional. I cropped the image 16.5 pixels on the bottom and 16.5 pixels on the top, which made it perfect for the image.

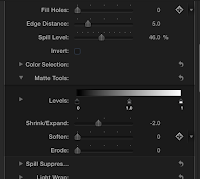
6) Then, I had to make sure the green screen image was smoothly in front of the image. I played around with the 'Keyer' tool and made sure that 'Fill Holes' was on 0, Edge Distance was on 5.0 and Spill level was on 45.%.

7) It still seemed after this that there was a grey hue around the head of the protagonist. Therefore, I used the Shrink/Expand on -2.0 to get  rid of this issue.

8) I did the same thing on many other clips, playing around with the setting to make some elements transparent in order to see what style I liked best.


This is an example of using a different style of 'keyer' called 'Luma Keyer' which makes the image in front much more transparent and luminous. I thought this style could maybe be useful to convey the distorted, hazy nature of her mind.

Evaluation 

Pros

  • The pacing clip in front of the padded cell image is effective as it conveys how she feels trapped within her own mind and can't escape from her illness.
  • Having the antagonist in the background standing still makes her seem ominous and therefore aids the psychological genre.

Cons

  • If we were to film again, I would like to try and film with more of a Full Shot as it would maybe look more realistic, however this isn't much of a problem.
  • The pacing clip is a little too slow for the montage as all the clips need to be fast to fit in with the fast, dramatic pace of the scene. Therefore, we need to speed up the clip in some way to fix this. 


Thursday, 19 December 2013

Sound production for Time lapse and Library scene

Sound

It is vital that we start to work on our sound now that our filming is completed and our editing is well underway. We need to be able to provide sound throughout our trailer in a professional manner.

Time lapse and library scene
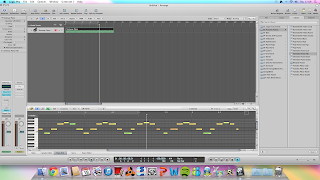
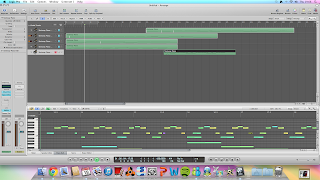
Our trailer opens with a time lapse and library scene of which both focus predominantly on the protagonist. We started to collate a few ideas around non diegetic sound for this scene and decided that it would be best to produce an instrumental piece of sound. To do this we used Logic Pro. Once I decided on the most effective motif, I played around with the left hand accompaniment to make sure that the foundation of the motif layer was sufficient. I continued to manipulate the motif in ways that I could to produce different sound with it that allowed to build the tension as it developed. Once I was satisfied with the layers surrounding the motif it was time to put them together. We are also using a white noise sound effect, which has already been edited into our footage to convey the protagonists discomfort and build the tension as things spiral out of control.
 Although, an issue I ran into was the difference in note values. In order to overcome this I was able to double click on the audio track and either slide or squeeze the length of notes to correct the mistakes. This proved to be extremely helpful as it saved me from recording again.

Evaluation of time lapse and library scene sound:
Looking back over our research we realised that using an instrumental track for the opening would be the best idea. This is because we would be able to manipulate it easily and build up more of a suspense. Overall, we think that the sound for the time lapse and library scene is effective as it doesn't give too much away but still hints at disequilibrium in the narrative of the trailer as it develops.

Montage and green screen sound
As well as our time lapse and library scene being key parts of our trailer. So is our montage and green screen scenes. When using the green screen, we have already established that we are going to be using whispers layered on top of each other that repeat the name "Charley" as the protagonists imaginary friend whispers into her ear. We also felt that this was very effective as it is specific to our characters and we have been able to manipulate it further to create the discomfort that we were aiming for.

 Additionally, we have also decided to use generic trailer transition sounds such as loud crashes and bangs as the protagonist loses her grip on reality. A key scene that we could apply these sounds to would be the scene where the protagonist stalks the antagonist - Charley, via Facebook and webcam. As well as using the generic trailer sounds, we will be able to layer the discordant sounds on top of the eerie melody of the piano without it sounding off key as these sounds tend to not be homed by any such key. We also have a lot of choice when it comes to manipulating the sound to sound eerie and discomforting due to our prior research that is shown below:

Now that we non diegetic sound for the beginning of our trailer, we need to make sure that we edit it into our footage. Following on from that we also need to be able to narrow down what sounds that we wish to use as we are only limited to 1 minutes worth of sound. Once we have decided on the sounds that we are going to use, instead of layering the sounds that we wish to use in iMovie, we will need to manipulate them and create one track solely for entire sound that we will use for our trailer. This will hopefully avoid the problem of confusing sounds and having too many tracks when editing. Therefore, if we wish to add any further tracks, e.g. the white noise sound effect, we will be able to build tension sufficiently without it sounding unprofessional. 

Evaluation of montage

 Over the last week we have filmed some extra scenes for our montage sequence. We examined the news clips which had been imported into our project, and decided that they were very effective, they add a sense of realism and make sure that we are showing a link back to our focus - mental illness and CCTV.

Another good thing about these clips is that it adds more to our plot, nothing specific so the audience is left wanting more, but it gives more of a context to our work so they can grasp what the whole film would be about.

The extra scenes we filmed for the montage add a certain level of depth to our trailer. The scene in the rain helps to show both the depressive mindset our characters are experiencing, and also creates quite a gloomy atmosphere which fits in with the rest of our footage and editing that has been done to the colours.

We also filmed the scene where the sandbag is placed over our victim's head, this is effective in our trailer as we literally only need to show a couple of seconds for an important message to be put across to our audience. It will mean they immediately know there is a sense of violence in our film and that due to the schizophrenia our protagonist has been pushed to extremes.

The combination of the other extra shots we filmed to be used in the montage sequence will give us a lot more freedom in the editing stages. It will mean that we have the option to either split up the different news clips and clips from other sources, or have them together with our shots together. The shots of our victim waiting to move, and the footsteps both portray two different ideas to the audience. It makes the victim seem even more isolated and also creates the sense of being followed, making her appear to be even more vulnerable, and provides a bit of a build up to our loft scene.

Making the Poster A4


-One thing I noticed when creating the poster was that the image was square, I realised we wouldn't be able to use if it this was the case therefore I researched the size of an A4 sheet and resized the image.
- This meant that the image appeared a bit stretched, however it could just be that it looks different to the previous image and wouldn't be that noticeable if someone who had never seen the poster before looked at it.
- When I did this I then noticed that the title was obviously too big and the typography didn't fit, therefore I had to resize all of this as well and so that it would look okay.
- However now all the typography looks squashed therefore I will need to create the tagline again on the poster so that it is the correct size and so that it doesn't pixilate and then I will need to drag the title 'UNHINGED' back onto the poster.
- Because I had to reinsert the tagline I then decided to play around with the shadows and blurriness of the text.

- In the tagline below I duplicated the layers and made the second one extremely blurry so that it would be a shadow underneath the text.
- I then made herself blurrier than the rest to show that the line between what is real and what isn't is very fuzzy for our protagonist.
- I then also inserted images of the production companies we are using and put them in the gaps visible on either side of the text.

Montage Editing

 1) First, I had to download all the clips from youtube and then choose which parts of the footage to use in our montage. I then exported every two youtube clips together with the desired short clips and exported them.

2) Then, I transferred the material to school and imported them into final cut. I also had to import the filming that we did of the victim being kidnapped, as well as the green screen footage that I recently edited.

3) I had to sort through the footage and decide what to use and what not to use.

4) I went through all the youtube clips and made sure each clip was suitable for the montage by cropping certain clips so that there was not too much of a large black border around this, as this would seem unprofessional.

5) Then, I dragged all the footage into the project and made them the right length. As it is a montage it is necessary for all the shots to be short and snappy. I cropped all the footage so that it was 1 second long, so that it would all be the same length and not look messy.

6) I took inspiration from the Sinister trailer, as well as other trailers by using a black transition screen in between the 1 second clips, to add drama. I made sure all transitions were 0:15 seconds long, for effect.

7) I repeated the same for all the footage we imported, and then dragged in the youtube clips. I used a specific order of: kidnapping scene > transition > mental illness clip > kidnapping scene, so that it would make more logical sense.

8) I made clips nearer the end of the montage become increasingly shorter as this would make it more and more dramatic as it goes on, leading to the climax scene which is the loft scene.

Evaluation

Pros
  • Effective at building tension before the climax, which is important in a trailer.
  • Conventional of genre- inspiration taken from Sinister
  • Uses clips from old fashioned documentary, effective and adds to surreal effect

Cons
  • Some of the lighting is dark, however we can fix this in later stages. 
  • Some of the clips are too fast to be seen properly at the end- will have to reorder some of the clips. 

Putting our typography onto the website

When putting the typography onto our website we had encountered some problems recently, because we hadn't been able to save the text with a transparent background correctly.

First of all, I wanted to get to the bottom of our saving problem. I opened up the file, selected it, and the background was transparent. However the file was too big so I began by cropping it.
Here I de-selected the text, and decided to crop the image so it was just a line of text.
Here you can see I have cropped the text, so I then went to 'Save As..' and saved the file as a PNG file so that the background was transparent. I had no problems with this and then went onto putting it onto the website.

Because of the problems we had encountered last week, I wanted to check that we weren't placing the image on our website wrong, so I did a test by coding the image to be displayed. This worked, and I was able to bring up the image and it was successful because it had the transparent background. However, at this point I encountered another problem, the typography was black and therefore wouldn't show up on our website background.
In order to change the colour of the typography, I had to make it again from scratch, because once you have written the text you 'rasterize' it, meaning you can no longer change the font colour. It didn't take me too long and I applied the same effects as before making sure the text was white and the canvas was transparent.
I then cropped the image and here you can see me applying the 'wind' effect to our typography, demonstrating our typography manipulation. I then proceeded to save the image in the same way as before with a transparent background.

After testing placing the image using html code, I could just position the image on using Wix's built in feature,  I resized the tag line so that it would fit and then deleted the old, temporary one and positioned the new one.


For the title, I had a similar issue, because again it had been coloured black. I did a quick test and imported it onto the website, it was transparent but there were issues with the colours, it looked unprofessional and unclear.


I then went back into Photoshop and started work on trying to recolour this. I didn't have time to re start the typography from scratch, so I had to use the 'fill' tool and zoom in to recolour it to white. Before saving I cropped the image and again saved it with a transparent background.


Here you can see as I was positioning it on the website, I deleted the old title and resized the image so that it would fit in place. I think that together it works well and looks professional.


Here you can see the finished website, and on reflection I think that one of our next tasks should be changing the typography of the page font and review fonts.

Saturday, 14 December 2013

Official Storyboard

Box 1:
- This box demonstrates the time lapse at the beginning, which will be of the sun going down/up as the protagonist is sitting against a tree reading. 

Box 2 & 3:
- These boxes is show the library scene where there are close up shots of hands, eyes and faces, long shots of the protagonist and the antagonist, and pov shots. This scene will provide the equilibrium before the trailer gets worse. 

Box 4:
- This box shows the scene where the protagonist is spying on the antagonist, here we have some close up shots of lips and legs, we have high angle shots of the antagonist doing stuff such as drying her hair, we have over the shoulder shots of the protagonist, we have an establishing shot of the antagonist's room which is edited with a flashing recording sign. 

Box 5:
- This is the green screen section, where we have the protagonist scrolling through the antagonist's facebook page until she comes across an upsetting post and she slams the laptop shut. Then we have her imaginary friend whisper 'Charley' repetitively into her ear. 

Box 6:
- Here we have the physical stalking scene where the camera stays the same with a long shot of the antagonist walking down an alley way and turning out, and then it pans down to see the protagonist's feet waiting for the antagonist at the end of the alleyway. 

Box 7:
- This portrays the montage scene, where we will have shots from the green screen, close up shots and shots that were taken from other footage found on YouTube that is relevant to our trailer. 

Box 8:
- This is the final scene, here we have close up shots of the antagonists face, POV shots of the room and her body tied up to a chair, and a long shot of her tied to a chair and screaming. This is the final scene which will hopefully provide the jump at the end. 

Evaluation:
- I feel that the way the scenes progress are suitable as they raise enough tension and although not much is revealed I feel enough has been revealed to ensure the audience is following.