Poster image: Ghosting on Photoshop
After finding a tutorial on how to create a ghost effect on Photoshop, we decided that after finding a suitable test image to try it out on - it would be effective as a poster image.
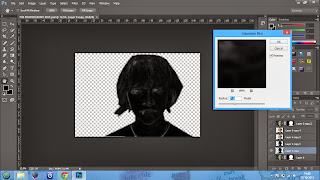
I started by inserting the test image of our protagonist. I then used the "Pen" tool and outlined the protagonist therefore eliminating the background of the image. Following this, I selected the "mask" option at the bottom right had corner and then refined the mask, making it look less harsh and more realistic.
I then selected "filter" from the tool bar, "filter gallery", "stylize" and selected "glowing edges" which made the image appear black and the detailing of the image colourful. I then went to "filter" again, selected "stylize" and "diffuse" - "anisotropic" which made the colours a lot more predominant.
 Then I selected "image" on the tool bar, "adjustments" and then "Channel Mixer" in order to select "Black and White with a Yellow Filter" from the list - this eliminated the coloured outlines on the image making it monochrome. After this, I went to the filter option, selected "stylize" and then chose "solarize" and then added "gaussian blur" to it and adjusting it to 7.8 so it gave off a convincing ghosting effect.
 We then selected the filter option and then chose the wind effect to achieve the look that we were hoping for. However we wanted to convey that the two images drew a distinction somehow.


No comments:
Post a Comment